 Save
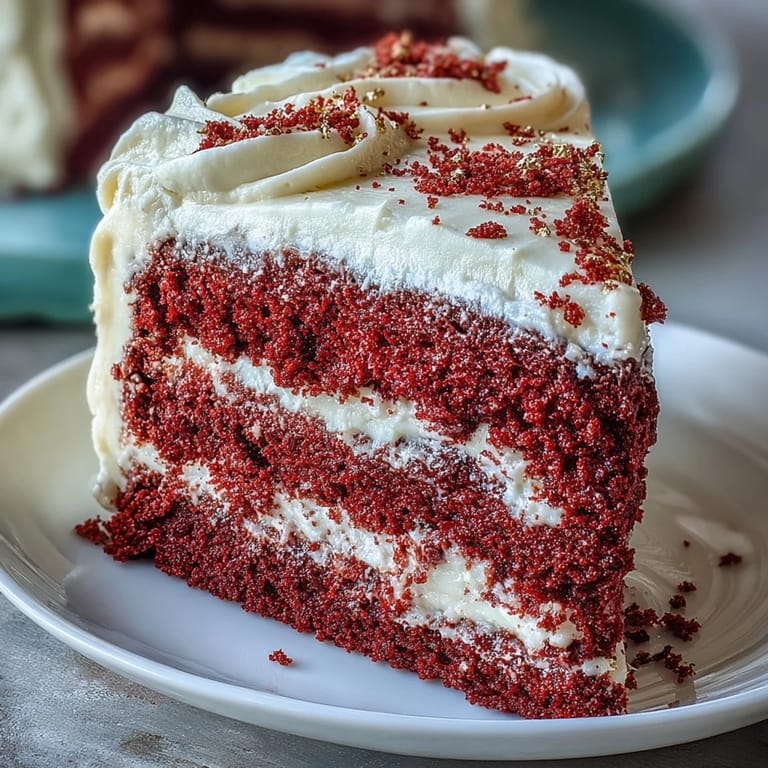
Save There’s something about the vibrant hue of red velvet cake that always brings a smile to my face. I first stumbled upon this delightful dessert at a Juneteenth celebration, where the sweet aroma of cocoa merged harmoniously with the tangy scent of cream cheese frosting. I still remember how the cake practically sang with the energy of the joyous gathering, as family and friends shared laughter and stories. Making this cake is like weaving together threads of tradition and celebration, and every time I bake one, those joyful moments return, wrapping me in warmth. It’s a cake that doesn't just feast the eyes but nourishes the soul.
I once made this cake for a friend's birthday, and the look on their face when they took the first bite was priceless. Surrounded by friends, we all dove into the layers together, and it was like magic as everyone united in sweet bliss. There were laughs over frosting smudges and attempts at frosting decorations that turned comically messy but only added to the celebration's charm. It felt like a moment frozen in time, with each slice shared becoming a piece of joy amongst us. That cake turned an ordinary day into a memorable festivity.
Ingredients
- All-purpose flour: This is the backbone of the cake, providing the necessary structure.
- Granulated sugar: A key player in sweetness, helping the cake rise beautifully.
- Baking soda: The magic leavening agent that helps the cake achieve its fluffy texture.
- Cocoa powder: Just a hint gives a rich flavor without overpowering the signature red.
- Vegetable oil: Ensures your cake stays moist and tender, adding richness.
- Buttermilk: This ingredient brings a lovely tang and reacts with the baking soda for extra lift.
- Eggs: They bind everything together and add to the structure.
- Red food coloring: The reason for the cake’s iconic color, bringing vibrancy to every slice.
- Distilled white vinegar: Works with the buttermilk to enhance the cake’s fluffiness.
- Vanilla extract: A touch of sweetness that rounds out all the flavors perfectly.
- Cream cheese: The star of the frosting, delivering that delightful tang.
- Unsalted butter: Adds creaminess and richness to the frosting.
- Powdered sugar: For sweetness and a smooth texture in the frosting.
- Salt: A pinch to balance out the sweetness.
Tired of Takeout? 🥡
Get 10 meals you can make faster than delivery arrives. Seriously.
One email. No spam. Unsubscribe anytime.
Instructions
- Preheat the Oven:
- Start by preheating your oven to 350°F (175°C) and prepare two 9-inch round cake pans by greasing and flouring them. The smell of the oven warming up is a prelude to the deliciousness to come.
- Mix the Dry Ingredients:
- In a bowl, sift together the flour, sugar, baking soda, salt, and cocoa powder. This creates an airy, light mix that promises a soft cake.
- Combine the Wet Ingredients:
- In a large bowl, whisk together the oil, buttermilk, eggs, food coloring, vinegar, and vanilla until they sing harmoniously. The vibrant color will instantly lift your spirits!
- Combine Wet and Dry:
- Gradually add the dry ingredients to the wet mixture, mixing until just combined. Remember, overmixing is not our friend here!
- Bake the Cakes:
- Divide the batter evenly between the prepared pans and bake for 28-32 minutes, or until a toothpick comes out clean. There’s something so satisfying about that gentle rise!
- Cool Down:
- Let cakes cool in the pans for 10 minutes, then transfer to a wire rack to cool completely. Patience is key—this cool-down period is essential for a perfectly frosted cake.
- Make the Frosting:
- Beat the cream cheese and butter together until light and fluffy, then add in the powdered sugar, vanilla, and salt until smooth. The creamy frosting will make your kitchen smell divine!
- Assemble the Cake:
- Once the cakes are completely cool, spread a layer of cream cheese frosting between the layers and frost the top and sides generously. Feel free to get creative with decorations if you like!
 Save
Save 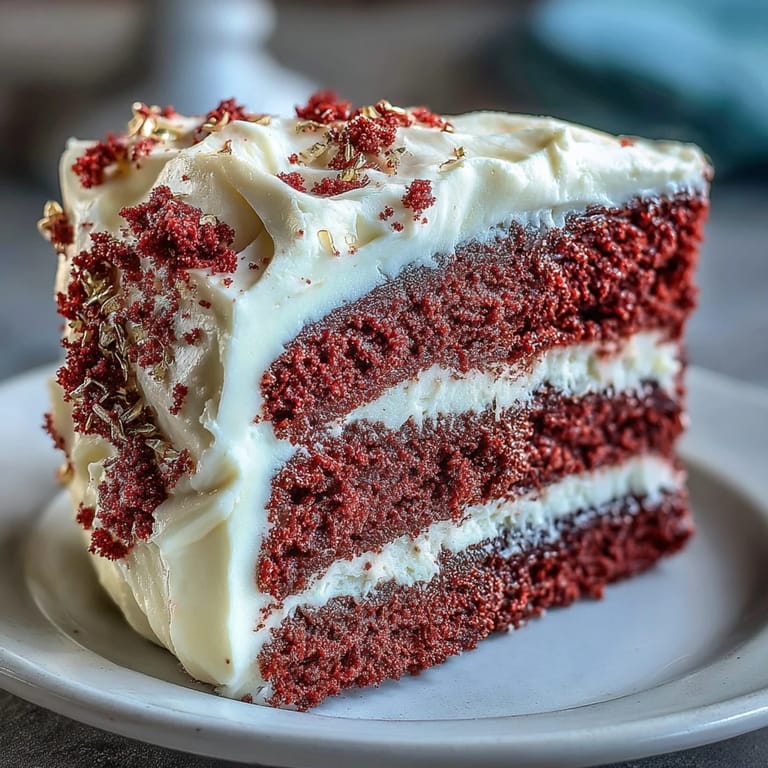 Save
Save The moment I placed that beautifully frosted cake on the table, I realized it was more than just dessert—it was a symbol of togetherness. Laughter echoed around the room, and as each slice was shared, stories flowed freely, binding us all closer. It turned a simple get-together into a cherished memory, one slice at a time.
Celebrate with Creativity
This cake is perfect for any celebration, but don’t hesitate to put your spin on it. You can try different frostings or even adjust the flavoring, like adding orange zest for a citrus twist!
Baking Together
Baking this cake is a wonderful way to bond with friends or family. It encourages conversation and laughter amidst the buzzing of mixer and whispers of cherished recipes.
Decoration Inspiration
Get playful with the decor—a sprinkle of red or gold can really elevate the look of your cake.
- Try using fresh berries for a pop of color.
- Opt for chocolate shavings for a rich addition.
- Remember, a simple dusting of powdered sugar can be just as elegant.
 Save
Save 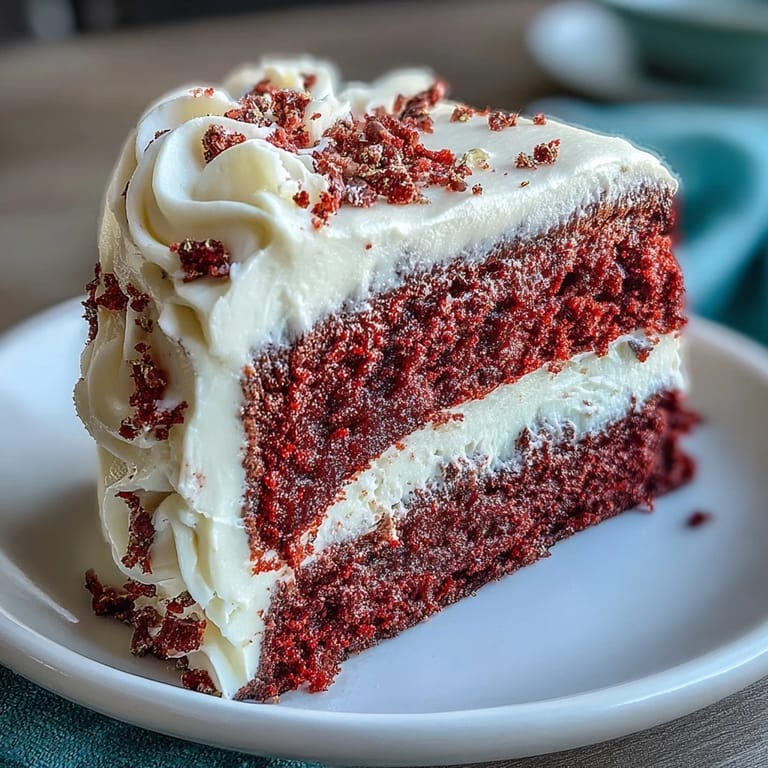 Save
Save This cake is more than just a recipe; it's a celebration of love, community, and tradition. Enjoy every slice and every moment it creates.
Recipe FAQs
- → What is red velvet cake?
Red velvet cake is a classic dessert known for its deep red color and rich, velvety texture. It typically has a slight chocolate flavor and is paired with cream cheese frosting.
- → How should I store leftover cake?
Leftover cake should be stored in an airtight container in the refrigerator. It can last up to a week when properly stored.
- → Can I make this cake ahead of time?
Yes, you can make the cake a day in advance. Just ensure it's cooled completely before wrapping it and storing it in the fridge.
- → Is this cake suitable for vegetarians?
Yes, this Juneteenth Red Velvet Cake is vegetarian-friendly as it does not contain any meat or meat products.
- → How can I enhance the flavor of the frosting?
You can add a hint of orange zest or a splash of vanilla extract to the frosting to enhance its flavor profile.